
When attaching heavy fixtures to hollow walls, concrete blocks, or brick surfaces, a standard wood screw or self-tapping screw will not hold — the substrate lacks density to grip threads securely. A proper wall anchor screw installation is critical whether you are mounting shelving, handrails, electrical panels, or HVAC brackets. Selecting the right anchor and installing it correctly ensures a load-bearing connection that stays secure for years. For wholesalers and construction buyers, stocking the correct anchors and matching fasteners is as important as specifying them correctly for each job.
## Understanding Wall Anchor Types and Their Application
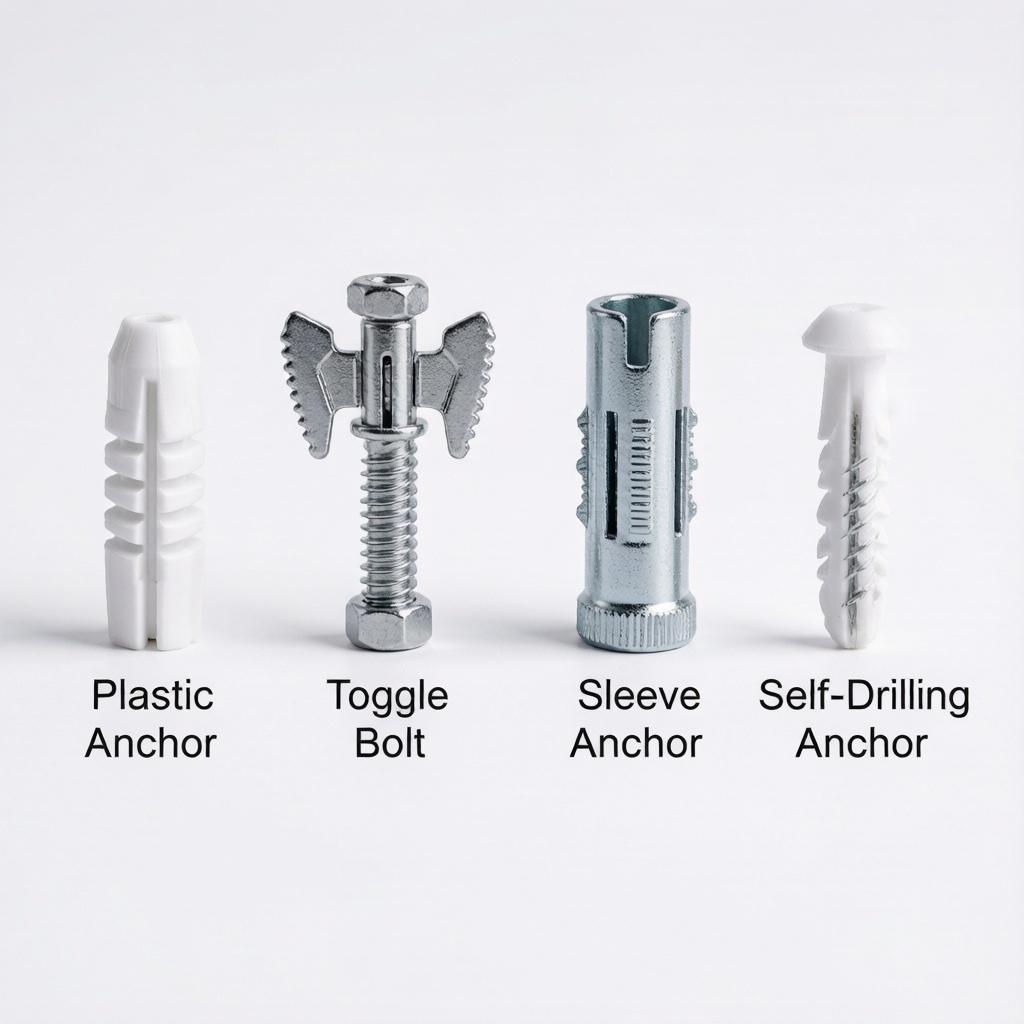
Not all wall anchors work the same way. Choosing the right type is the first step in any reliable wall anchor screw installation.
**Plastic expansion anchors** are the most common choice for light to medium loads in drywall and plaster. The screw expands the plastic sleeve against the wall cavity, creating a friction hold. These suit light shelves, picture frames, and small electrical boxes with loads up to approximately 15 kg.
**Metal toggle bolts** (butterfly anchors) are designed for heavy-duty hollow-wall applications. Spring-loaded wings open behind the wallboard, distributing weight across a larger surface area. These anchors are commonly specified for grab bars, wall-mounted cabinets, and commercial HVAC brackets, supporting loads of 50 kg or more.
**Sleeve anchors and wedge anchors** are engineered for solid substrates — concrete, brick, and stone. They expand against the inside of a drilled hole through mechanical wedging action, making them the preferred choice for structural applications such as steel handrail bases and machinery mounting plates.
**Self-drilling drywall anchors** combine the anchor body with an integrated drill tip, allowing installation without pre-drilling. These nylon or zinc-alloy fasteners thread directly into drywall and accept standard machine screws, popular in volume-driven electrical and fit-out contracting where speed matters.
## Step-by-Step Wall Anchor Screw Installation Guide
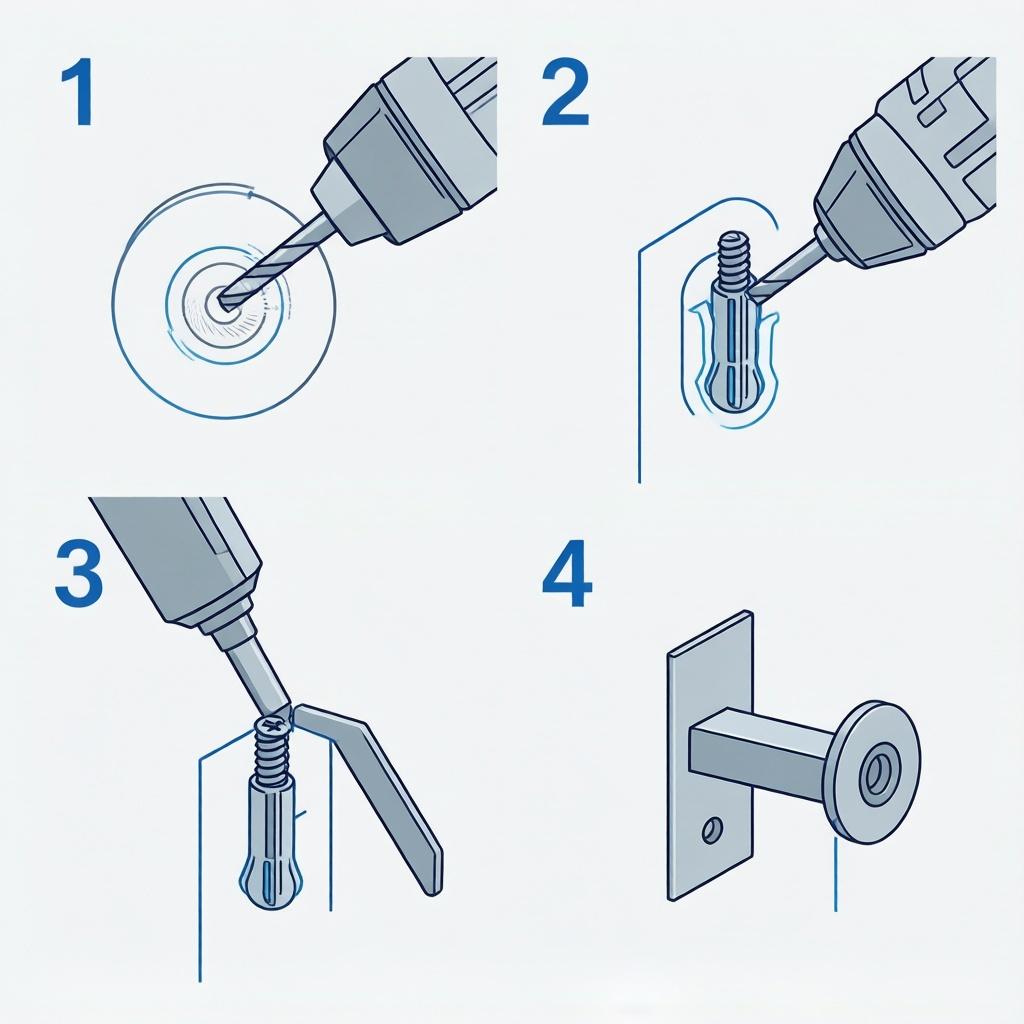
Correct procedure is what separates a secure anchor from a call-back. Follow these steps for a reliable wall anchor screw installation:
1. **Identify the substrate.** Determine whether the wall is hollow (drywall), solid (concrete/brick), or plaster-over-lath before selecting an anchor. Using a toggle bolt in concrete or a sleeve anchor in drywall will both fail.
2. **Mark the position and check for obstructions.** Use a stud finder or cable detector to confirm no wiring or pipework runs behind the drilling point. Mark the hole location precisely.
3. **Select the correct drill bit size.** The anchor packaging always specifies the required hole diameter. Too small and the anchor deforms during insertion; too large and the anchor spins. For wedge and sleeve anchors in concrete, hole depth must also match the embedment requirement.
4. **Drill the hole clean.** Use a masonry bit for brick and concrete, or a standard HSS bit for drywall. Keep the drill perpendicular to the wall surface. Clear all dust from the hole — a blow-out bulb or compressed air — as residual dust reduces friction grip.
5. **Insert the anchor fully.** Press or lightly tap the anchor until it sits flush with the wall. For toggle bolts, thread the bolt through the fixture before collapsing the wings and pushing them through. For sleeve anchors, ensure the sleeve is fully seated before tightening.
6. **Position the fixture and drive the screw.** Align the fixture over the anchor and insert the screw. Tighten firmly but do not over-torque — excessive force can strip the anchor, crack drywall, or snap the screw head. For concrete anchors, use a torque wrench to meet the specified setting.
7. **Test the hold.** Apply moderate load by hand before trusting the connection. If any movement is detected, back out and inspect whether the anchor was sized correctly for both substrate and fixture weight.
## Common Mistakes During Wall Anchor Screw Installation
The most frequent errors include using the wrong anchor type for the substrate, drilling an oversized hole that prevents expansion, and over-tightening which strips threads or cracks surrounding material. Neglecting fixture thickness is another common mistake — if the bracket is thicker than anticipated, a longer screw or deeper-set anchor may be required. Always check the manufacturer's load rating for both shear and pull-out forces.
## Summary
A well-executed wall anchor screw installation depends on three factors: selecting the right anchor for the substrate, drilling accurately, and tightening to the correct torque. For professionals across construction, electrical contracting, and industrial maintenance, mastering these steps reduces call-backs and improves installation quality. Whether using plastic expansion anchors for light-duty drywall or wedge anchors for structural concrete, precision delivers a connection you can trust.
**Partner with EC FASTENER for Your Fastener Supply**
At EC FASTENER, we supply a comprehensive range of wall anchors — from standard nylon expansion plugs to heavy-duty metal sleeve anchors and toggle bolts — all manufactured to DIN, ISO, and ANSI standards. Our product line covers drywall, concrete, brick, and aerated block with matching screws in carbon steel, zinc-plated, and stainless steel finishes. We serve wholesale distributors, importers, and OEM buyers across Europe, North America, and Southeast Asia, offering competitive volume pricing, custom packaging, and private-label options on bulk orders.
**Contact EC FASTENER today for a wholesale quote on wall anchors and matching screws — specify your anchor type, size, material, and quantity for prompt pricing and samples.**